Halloween is one of the best times of year to get your creative juices flowing, especially if you’re a horror hound. If you’ve advanced slightly beyond the pedestrian type of projects, here are some cool and neat ideas to help you prepare for All Hollows Eve. A word of caution, however; some of these are dangerous and a couple of them may induce night terrors in small children.
No.5 Corpse a Skeleton

This project is fairly involved, so don’t start on October 31st.
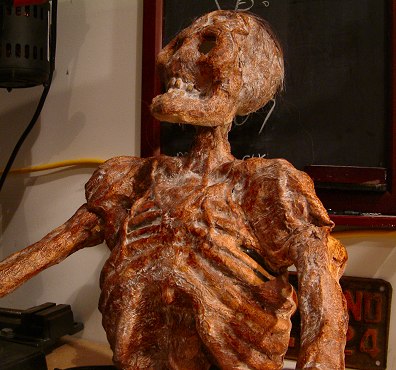
We’ve all seen those scarecrows stuffed in the corner on a chair outside someone’s front door at Halloween. It’s a pretty common sight. So is that plastic human skeleton hanging around. But wouldn’t it be cooler to have a decomposing corpse instead? Hell yeah!
Here’s how to do it:
You’ll need to go buy that el-cheapo plastic skeleton at some novelty shop or another. Then you’ll need a quart of carpet adhesive, a roll of paper towels, and a can of redwood stain.
Put on some latex gloves and coat the chest with the carpet adhesive. Tear off strips of paper towel and shove them into the adhesive and cover with more adhesive. Repeat until the torso is covered, working on the front and then the back. Now do a second layer, but you might want to try to create some textures with the paper towels. Try forming wrinkles and bumps.
Now do the same application to the skull.
Time for the limbs. Make sure to pose your skeleton the way you want because after the adhesive and paper towels are applied the joints won’t work. Play with the lengths of the paper towel strips and you can create some muscle textures.
Now stain the damn thing to give it some color. It’s probably best to use a cloth or sponge to make it look as realistic as possible. Let it dry and then generously dust your creation with talcum powder so that it doesn’t stick to everything. Remove excess talcum if you wish.
No.4 Glow-in-the-Dark Pumpkin

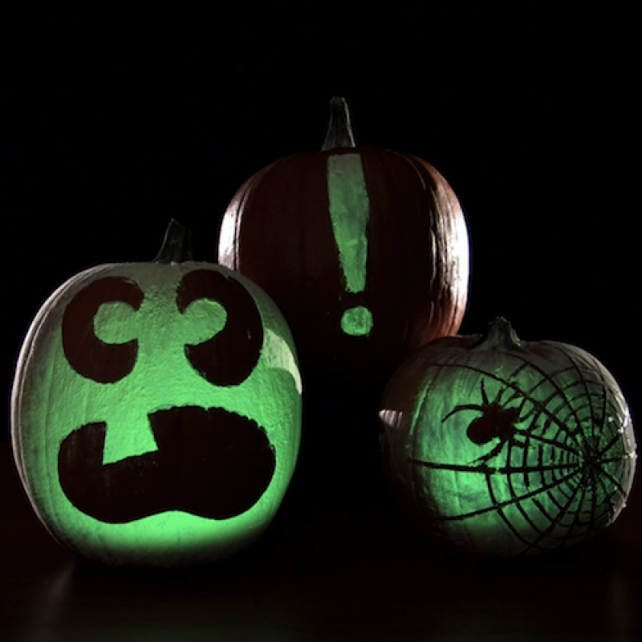
Nothing beats a well-carved jack-o’-lantern with a candle inside for that sinister glow. However, if you want to try something different this Halloween, you might consider creating a glow-in-the-dark jack-o’-lantern. We’re pretty sure you’ll be the only house on the block with the eerie greenish glowing jack-o’-lantern.
It’s super easy to achieve this look too. All you need to do is visit your local arts and crafts store to pick up some glow-in-the-dark paint and paint the pumkin. Pretty much any type of zinc sulfide glow-in-the-dark paint will do, but for a more intense glow you’ll want to use a blacklight to charge the paint. If you don’t want to use a light to charge the paint, consider using a tritium-based paint.
If you want a true jack-o’-lantern with a face, either carve the face or use tape to outline the design prior to painting. Once dry, charge the paint with a light to see how brightly it glows. Add another coat or two of paint if you want a more intense glow. Once you’re satisfied, remove the tape once the paint is dry.
We have three more DIY Halloween projects for you after the jump…


Stay Connected